About Me

Sunday, February 8

Sunday Spice Tip - Cinnamon

Cinnamon.
Sweet. Spicy. Warm. Woody.

So what comes to mind when you think of Cinnamon? Maybe you're reminded of grandma's classic apple pie. Or how about the cinnamon sticks we used to dunk in hot apple cider as kids? More likely than either of those you probably remember the ridiculous yet hilarious cinnamon challenge videos that went viral several years ago, which featured the freak-outs of foolish individuals trying to swallow a spoonful of this pungent spice. Ahhh good times, seems like it was only just yesterday...

Ok enough reminiscing. Despite it's previous internet fame, let's use grandma's apple pie as a better example of how we can use cinnamon to enhance our food. 


Apple & Cinnamon. One of the most classic and delicious combinations ever. Much like how salt enhances all flavours, cinnamon in particular boosts the sweet notes of food with it's own spicy-savoury sweetness. While tasting cinnamon on it's own is generally quite uninspiring, it's actually the rich aroma which lends cinnamon it's unique flavour notes. 

What exactly do I mean? Ever notice how the flavour of food is dull when your nose is stuffed or you have a cold? I'll explain why with very technical terms. Our sense of taste and smell are linked together so that scents intensify flavours. Without smell, nothing actually tastes as it should. Watch the first 2 minutes of this if you want the whole picture: https://www.youtube.com/watch?v=EJud8MKrvBE

Native to Bangladesh, Sri Lanka, and Burma, cinnamon has a long, rich history as being one of the world's most popular spices. In modern times, most commercially available cinnamon is actually made from related species of the original cinnamon tree. Referred to as "cassia" to distinguish them from true cinnamon, these relative trees make up the largest percentage of production crops. Although traditionally peeled from the inner bark of cinnamon trees, ground cinnamon is a more versatile and cook-friendly way to reap all the same benefits. 


Excellent when used with... desserts, baking, beverages, & Indian/Caribbean cuisine.
Cinnamon rolls, cinnamon toast, pies, pancakes, muffins, other pastries, oatmeal, cereal, apple cider, hot chocolate, coffee, cocktails, curry chicken and jerk chicken are all places you will find cinnamon's warm and spicy aroma being put to good use. Personally, cinnamon is a must-have in my morning oatmeal and seems butt-naked without it! If you don't already have cinnamon in your spice collection, grab a bottle! It's time you discover this historic flavour of the world.

Let's try it out!
This week I'm featuring Cinnamon as one of the key flavours in my Granola & Yogurt Parfait.

Sunday, February 1

Sunday Spice Tip - Smoky Roasted Red Pepper Soup

Warm up with this classic
soup, infused
with a rich, bold twist

Our very first Sunday Spice Tip featured Smoked Paprika, a deliciously rich, smoky, and luxurious spice that adds a touch of sweetness. Check the post if you havn't already, grab a bottle, then meet me back here so you can try it out with this luscious Roasted Red Pepper Soup.

If you're like me and live in Southern Ontario, you've probably already been out shovelling loads of snow from your driveway, making snow angels, and worked up quite an appetite doing so. Now it's time to refuel and cozy up to a warm, satisfying meal while dreaming of spring and flipflops. 

Inspired by snow shovelling and frostbite, today's soup is a mouthwatering blend of roasted vegetables and spices, slightly charred to develop a unique smoky barbeque flavour. With only basic ingredients required, this a rockstar of a soup that anyone can make! Let's see how it's done.


Pre-Method
Start by deciding how much soup you want to make. Generally one medium red pepper equals one serving of soup, so if you want to make enough to last the week you'll need 7, brilliant huh? More can be made at once and frozen for future use. Onions, garlic, and a tomato are used as well to round off our vegetables to be roasted. Depending on your oven size, you may be able to fit 2 baking sheets at once, but otherwise you'll have to roast half the ingredients at a time. We'll be using the oven broiler to speed up the roasting process and to develop a slight char and more flavour, just keep an eye on things so nothing burns. You guys would never let that happen right ;)

A Guideline for 5 servings,
You'll need:

- 5 red peppers
- 3 medium sized yellow onions
- 1 large tomato
- 5 garlic cloves
- 3 to 4 tbsp oil
- 1.5 tbsp smoked paprika
- 1 to 1.5 tbsp cumin powder
- 2 tsp salt
- 4 cups chicken or vegetable stock (approx)
- 1 cup coconut milk
- 1 cup cilantro leaves (optional)
- 1 lime

Method
1. Wash peppers and tomato. Slice tomato into wedges and add to a large bowl. Slice the peppers into flat portions as seen here, https://www.youtube.com/watch?v=o28yI1XTQQU ensuring no white ribs remain. Add to the bowl. Peel garlic cloves & add. Cut onions in half from tip to root and peel off the skin. If the root is dirty, slice ONLY the brown off, none of the flesh. The root keeps the layers together meaning they will cook evenly. Add these to the bowl too.


2. Drizzle oil over the vegetables. Too much is better than not enough here. Sprinkle with smoked paprika, cumin, salt, and mix with hands to combine, ensuring every piece is coated evenly. Wash hands and lay either tin foil or parchment paper over a baking sheet(s). Transfer vegetables to sheet and space evenly, ensuring ingredients don't overlap. Place baking sheet on your oven's middle rack and set to broil. Once a slight char develops on vegetables, flip them over and char the other side. Approx. 8 minutes per side but keep an eye on things, aim for something like this -->


3. Once everything is roasted and charred, transfer to a large pot and set on medium-high heat. Once starting to sizzle, cook for 5 minutes, stirring often. Then add 2/3 of your stock and bring to a simmer. When simmering, turn off the heat and locate your blender. An immersion blender works well here. Blitz, in batches if necessary, until a smooth consistency is reached. Return soup to pot and set back on med-high heat.

4. Evaluate the consistency of your soup. If too thick for your liking, add the either the rest of the stock and/or coconut milk to achieve your dezired consistency. If too thin, leave the lid off so the soup can reduce, otherwise cover and cook for 30 minutes to 1 hour, reducing the heat to maintain a gentle simmer. Halfway through, season to taste with salt and pepper until your inner chef is satisfied!

5. In the last 5 minutes of cooking, chop cilantro if dezired and add to the soup along with the juice of a fresh lime. Add half the juice at a time, then taste, to ensure flavour balance.

Done! Serve Hot!


*Bonus Marks
- Drizzle coconut milk or cream over soup to add contrast and interest
- Garnish with cilantro (or basil as I did) to add a delicate splash of colour
- Serve with a wedge of lime and sriracha for those who are more daring


**As always!
Let me know how it turns out for you, feel free to post your questions, comments, and stories below :)

Sunday Spice Tip - Smoked Paprika

 Spices. The variety is extraordinary, the combinations are endless. 

They transform the essence of a dish and give our food dimension. But how does one learn to use them? Here at Dezired Cuisine I've come up with a solution.. welcome to the first Sunday Spice Tip!

Originally, I planned to simply chat about a different spice each Sunday, giving you juicy details and hopefully encouraging you to try it out and start getting more comfortable with spices. However, I happened to use today's spice in an amazing dish earlier last week with outstanding results and knew I had to share it with you too. 2 in 1? Ca-chingggg!

Salt and pepper are the most classic examples of seasonings we typically think of first, and both are essentials in the kitchen. Let's build on that and see what else else is out there. We have access to much of the world's popular spices, all the way from the cuisines of India to Asia, Caribbean and Mediterranean. This isn't a new idea though. Access to spices from around the world has been going on since 3000 B.C when the great Spice Trade initially began (like me, you've probably heard something about this in a history class a long time ago. A quick Google search on this can make for a good read). So now, thanks to globalization, you walk into your favourite grocery store and can easily become overwhelmed with the variety of spices, most of which you've never even heard of. I'm here to shed some light on that crazy looking spice shelf and hopefully make you want to search out some of the real game-changers.

Smoked Paprika. Intense. Aromatic. Smoky. Luxurious.
The game definitely changed when I opened a McCormick brand Smoked Paprika for the first time. I was hit with an incredibly intense, delectable aroma that reminded me distinctly of a typical barbecue chip smell, but much more rich and intriguing. Most people have probably heard of it's cousin, regular Paprika, but flavour-wise the two spices are in completely different families.
I find regular Paprika to be much more mild with a subtle sweetness that usually (for me) gets lost when adding other spices to a given dish. I highly recommend trying it though as many people do enjoy the delicate flavour it adds. Smoked Paprika however is bold, charismatic, and stands out as a key flavour when added to food.

I won't beat around the spice bush here. Because McCormick gourmet spices are very high quality they are more expensive than most other brands. So when I was looking for a more reasonable alternative I eventually ended up at Bulk Barn (highly recommend as they make a huge variety of spices accessible to the average human being). After buying a baseball sized bag of the Smoked Paprika and using some of it I found it was less rich than the McCormick's. For the regular user it will work just fine and for the price I really can't complain but with a little research there are other sources and brands out there (try La Chinata Smoked Paprika), and trust me, it is definitely worth the search. However I do strongly recommend you treat yourself to a quality brand first for the best impression and impact. My first bottle lasted less than 2 weeks, it was just that amazing!

Excellent when used with... any type of vegetable or meat. 
Currys, stews, soups, pastas, sauces, and anything grilled or roasted will be enhanced with depth and sumptuous smoky savoury notes. Very versatile and easy to use with real impact. Add this spice to your collection and see how you can take almost any dish to the next level!

Let's try it out! 
This week I'm featuring Smoked Paprika as the key flavour in my Smoky Roasted Red Pepper Soup. 

Saturday, January 31

Phở Gà - Pho-nomenal. Pho-bulous. Pho-serious, try this!

This is one dish in which you can really taste the love <3
Explore the potential
of what a soup
can be...

You've all heard of the incredibly filling and delicious Vietnamese dish, Pho.. right? If you havn't, head over to your local asian restaurant, grab a bowl, and let your previous conceptions of what a soup is be shattered while you read on. Whether you have or you havn't though, you're in the right spot!


Pho. A hearty traditional Vietnamese soup composed of a special broth, noodles, sliced beef, and a few fresh garnishes. Pho Ga is the same except that sliced chicken is used instead of beef. Pho can also be made vegetarian but I won't be covering that today... sorry! I guess I'll have to make a separate post later on for that. Typically a whole chicken is rinsed well and placed in a large stockpot of boiling water to begin creating the broth and cooking the chicken. A few whole spices are then added along with a large whole white onion for flavour and to maintain broth clarity (I have no idea why this works). Once fully cooked the chicken is stripped of it's meat which is then sliced and saved. Done right, the broth is so flavourful that additional seasoning isn't necessary. I wanted to add more pizzazz to my chicken to really make it stand out though. 

For the ambitious cook: I firstly carved the whole chicken into choice cuts: breasts, legs, thighs, and wings, keeping the wing tips for the stock. As I carved I would remove the skin and discard it, I find leaving the chicken skin on doesn't allow your marinade to absorb as much as bare meat does so I opt to remove it. I then carefully de-boned the legs and thighs, removing fat pockets as I went (I sometimes get pretty anal about leaving fat on my meat, it's more work but I like the cleanness, the choice is of course yours), leaving me with clean, boneless meat, and a chicken carcass with extra bones. I placed the carcass, bones, and wingtips into a sealable bag, added salt, closed, & massaged. The meat went into another sealable bag along with smoked paprika, chili powder, and cayenne for a little heat. After sealing the bag and massaging it thoroughly so the spices evenly coated the contents I left them both in the fridge overnight so the flavours would permeate and develop. The next morning I fried the meat in my cast iron skillet to a gorgeously rich, dark red crust and sliced after cooling. Although more time consuming, treating the chicken this way developed incredible flavour, interest, and was a very cool project. This would be for a more adventurous or ambitious cook, the average cook should stick to the basic recipe for their first attempt to get the feel of things! 

While this may seem like quite a bit of work in the kitchen, Pho allows for more passive cooking compared to many other dishes, and the basic recipe is even easier. Although when you consider your average chicken can easily provide more than 6 meals, it's an excellent way to spend a couple hours on Sunday in the kitchen! 

P.S I know some people get caught up with the whole "gross" aspect of handling meat but honestly, would you rather the dirty guy in the back of KFC handling your precious chicken? Maybe, but preferably not. No offense to any employees of the brand though, you guys make awesome stuff. Anyways, try replacing your "eww" mindset with that of carving and sculpting a masterpiece!

Let's cook some Pho!

Pre-Method
There is no "one way" to make Pho. Pho broth can be made many different ways with slight variations in technique and ingredients, with many different garnishes that can be used when serving too. This is great because it means you can alter the recipe depending on what spices and ingredients you can/can't find (but please, just visit Bull Barn before thinking you can't find a spice). If any spices sound unfamiliar just Google up an image to give you an idea! The only MUST in pho making is that whole spices have to be used. This gives the broth all the necessary flavours and additional aroma while retaining clarity after straining which is a key trademark of pho. When serving there are a variety of garnishes that can be used. Some examples of traditional garnishes are:
- cilantro, (thai) basil, parsley
- red onion, yellow/white onion, green onion
- bean sprouts, chili peppers
- sriracha sauce, fish sauce, soy sauce, worcester sauce, hoisin sauce, fresh lime juice
Lastly, NEVER sauce another's broth! Give them the options but let them make the choice.

A Guideline,
You'll need:
- 1 whole chicken, washed. If making the advanced recipe ensure chicken is parted with skin removed. If more chickenyness is dezired you can purchase chicken backs or other boney parts to add more flavour, blanch these first for a few minutes to clean.
- 10-14 cups water depending on chicken size, should cover the chicken by at least an inch
- 2 large yellow onions or equal amount of smaller ones
- 4 inch stick of ginger
- 1 tbsp salt
- 1 tbsp sugar
- 2-3 tbsp fish sauce (optional)
Choose 3 only:
- 1 to 1.5 tbsp whole peppercorns
- 1 cinnamon stick
- 1.5 to 2 tbsp coriander seeds
- 2 star anise
- 4 whole cloves

Serving & Garnish - This is what's in my ideal bowl of Pho. Amounts are up to you, but for me, more is better :)
- Rice Noodles (dried, size & type is your choice!)
- cilantro leaves
- red onion, sliced extremely thin
- green onion, sliced thin
- bean sprouts
- sriracha sauce 

Method
Creating the Broth - 3 condensed steps
1. Pick 3 of the provided whole spices. Set a dry skillet on med. heat & let it come to temp. Place largest spice in pan & toast for 30 seconds, then add smaller ones and toast for 1 min, moving occasionally. This brings the spices to life, set aside.

2. Add water to a large stockpot and bring to boil. While waiting, add unpeeled onions and unpeeled ginger to a pan and set under broiler for approx. 10 minutes or until beginning to char. This cooks them slightly and they take on a sweeter taste. When charred, let cool, then peel. Ensuring chicken is thoroughly washed, place in pot when water is boiling. Then add toasted spices, peeled onion & ginger, salt, sugar, and simmer gently over med-low heat uncovered for 25 - 30 minutes depending on chicken size. Skim off any scum or foam that rises during this time. 

At this point the chicken is cooked, the flesh should be firm but still yield a bit to the touch. Using tongs, remove to a large bowl and flush with cold water to stop the cooking process. Once chicken has cooled enough to handle (15 mins), use a knife to remove the breasts, legs, & thighs to a plate. Do not slice at this point. Instead, cover with plastic wrap & refrigerate. Ensure broth maintains a gentle simmer during this time. Never parted a chicken? https://www.youtube.com/watch?v=Iyrkjvr23Qc 

3. Add the leftover carcass to the broth and adjust heat to maintain the gentle simmer. Cook another 1 to 1.5 hrs with the lid on. Avoid a hard boil. Halfway through, taste for seasoning! If you think more oomph is needed, add salt or fish sauce, only a little at a time. Taste again. Or if things seem a bit intense, try a little more sugar to balance it out. Once finished cooking, strain the broth into another pot/container/jars using either a fine mesh strainer, cheesecloth, or any other method that provides a fine filter. Small freezable containers are ideal for those with little fridge space, just reheat when needed!

Creating the Bowls - 5 steps
You can layer these however you want! This is just my method. Much of the garnishes can be prepped ahead of time. My best friend's family will fill containers with the ingredients so assembly throughout the week is quick and easy, I like quick and easy :)

1. Prep Onions. Halve your preferred red/white/yellow onion(s) and finely slice. These are eaten quite fresh so the thinner you can make the slices, the more enjoyable to eat. Fresh onion too intense? You can soak the slices for up to 30 minutes to make them more mild. Green onions can be cut however your inner chef sees fit! A few of these in the bottom of your bowl is the first step.

2. Prep Herbs. Pick leaves from stems and wash. If making enough for the week, dry them well. A salad spinner is great for this. Don't have one? Place them in the middle of a clean towel, fold up the sides, then spin and shake! Add some of these to your bowl next.

3. Prep Chicken. All of the chicken can be sliced ahead of time if dezired. 1/4 inch thick is ideal. If you don't want to eat the skin, feel free to remove it before slicing. Add several slices to your bowl.

4. Prep Noodles & Broth. A couple ways you can do this. Dry noodles can be pre-soaked in a large bowl with cold water for up to 1 day in advance. This is great when many bowls are being made in a short time span (family dinner, Pho for every meal :P etc.). Bring a med-sized pot of water to a boil. Place dry or pre-soaked noodles in a sieve or metal strainer and dunk for 20 to 90 seconds, stirring gently. The size/thickness of noodle will determine the cook time. Once only just cooked through (you may need to try one to confirm), remove and let water drain back into pot. If you overcooked them, run under cold water to halt them cooking further. Once drained, add to bowl. If using bean sprouts, you can blanch them for 30 seconds using the same method to soften slightly, IF you want. 

In another pot (or the same one if noodle cooking is complete, of course empty the noodle water first), add broth and bring to a boil. 2 cups max per bowl. Once starting to rapidly boil, remove from heat and pour into bowl(s). The hot broth will reheat the cold chicken and bring all ingredients up to temperature.

5. Final Garnish. The bottom of your bowl now has all the right stuff. Add interest and colour to the top of your bowl using the same ingredients, strewn about in an appealing fashion. Any of the sauces mentioned in the Pre-Method can now be served alongside the bowls, and each person can pick and choose at their pleasure. 

Done! Serve HOT!

While Pho making is a labour of love, understanding the process will allow you to efficiently create one of the best soups in the entire world! And after tasting, trust me, every bite is worth it :)

*Bonus Marks
- Serve with 1/8 to 1/4 of a fresh lime on the side and squeeze in the juice. This gives amazing freshness and tang to the savoury broth. Highly recommended!
- For more authenticity and full experience, use chopsticks and a chinese spoon instead of western utensils. Definitely makes things more interesting :)
- Slurp! When eating Pho, the act of slurping is respectful and a huge compliment to whoever put in the time and love to make it. In Vietnamese culture, not slurping or finishing the broth can offend the cook and make them think you didn't like or appreciate their gracious gift, so slurp on!

**As always!
Let me know how it turns out for you! Feel free to post your questions, comments, and stories below :)

Wednesday, January 14

Simple Granola + Quick Lesson on Effing Up Recipes

Screwing up sucks...

But it's totally ok! It's a fantastic and necessary opportunity to learn from your mistakes. Whether it's leaving your roast in the oven too long so it resembles the texture of sawdust, carefully sprinkling salt to taste when an avalanche decides to dislodge from the container rendering your entire meal inedible, or in my case leaving one teeny tiny detail overlooked which causes irreversible chaos to a dish that was laboured over during the whole afternoon. 


Based on my experience, the first reaction is generally "F*CKK!!". After a second or two of disbelief, the "NO, NO, IT'S GOING TO BE OK... SH*T!!" generally takes over. But after coming to terms with the gravity of what just happened and tasting to confirm, the "AW F*CKING SH*T!!!" starts to sink in. Some calm deep breathing can really help you on the road to recovery along with a glass of wine and eventually trying to laugh it off.

This was the exact sequence of events that took place when I was attempting to construct my version of a holiday granola bar back in December. Every other food related internet hotspot was coming out with their beautifully festive recipes and of course I had to follow suit with my own original dish. I absolutely love granola and I've wanted to put a recipe on here for a while now so what could possibly be better than a cheery, colourful granola bar recipe! As I spent the afternoon prepping my ingredients, diligently slicing my own fresh coconut, and taking photos for proof, I foresaw one of the best granola bar versions I had ever produced... until disaster struck.  


The potential here was enormous!

The scrumptious pumpkin and syrup blend that would bind my other ingredients was of course hot from reducing over the past half hour-ish, and I was finally ready to mix it into the oats, toasted coconut, dried cranberries and festive green chocolate. As soon as I poured it in and began to mix I saw the green chocolate start to melt and streak, turning the entire mix a putrid shade of green.. commence process of denial and acceptance. I continued with the baking and hoped for the best but I knew it wasn't going to win any aesthetic awards and later on certainly no flavour praise. I hoped that being a sweet "treat" it could still be consumed by the average human. But after serving a bar each to both of my parents, they collectively ingested less than one bite of my freakish bars before admitting their disgust. TOTAL BUST.

What didn't help my withdrawal the next morning was the note from my mom stating her disappointment in the "waste of ingredients and time" my project had been. And just to show me how it's done there was a container of simple but delicious granola left out on the table that had been made that same morning. Thanks Mom. After eating a bowlful and realizing it's superior taste I was able to laugh mine off and decided to document her creation instead. So low and behold, Simple Granola.

Pre-Method
This is a basic oat granola recipe that will give you great results very quickly, but depending on how ambitious and comfortable you feel you can add different nutrition and taste boosting elements. Some great options are seeds (pumpkin, chia, sunflower for example), coconut (freshly sliced is AMAAAAZING), and dried fruit (raisins, pineapple, cranberry, blueberry, etc. Depending how tough the fruit is I would suggest adding it after granola has cooked so it doesn't become too dry and chewy).

You'll need:
- 3 cups whole oats
- 3 tbsp packed brown sugar
- 1/2 tbsp cinnamon
- 1/4 - 1/2 tbsp salt (taste before adding more)
- 1/4 cup oil (avoid strong oils like olive, coconut oil for example can be a tasty and nutritious option)
- 1/3 cup honey
- 1 tsp vanilla extract
- 1/2 cup dried fruit (leave out till after baking)

Method
1.Preheat oven to 300F. In a large mixing bowl add oats, sugar, cinnamon, and salt. Mix well.

2. In another small container add oil, honey, and vanilla extract. Whisk together and add to your first bowl. Mix together well until everything is coated evenly.

3. In a rimmed baking sheet lay down a sheet of parchment paper, this makes stirring the granola and clean up super easy. Pour out granola onto baking sheet and spread evenly. 

4. Place baking sheet in oven and bake for 15 minutes. Then take out, stir up mixture, and spread evenly once again. Bake 5-15 minutes more until golden and smelling incredible. Less is more here.

5. Remove from oven and let cool to room temperature before eating or packaging. If you have dried fruit you can mix them in at this point. As the granola cools it become crisp and crunchy, don't be fooled if it is still somewhat moist after coming from the oven. Store in an airtight container up to 2 weeks.


Done! Serve at room temperature
*Bonus Marks
- Serve with a little milk or rice/almond/soy milk for a cool, crunchy cereal alternative
- My favourite! Add granola to a bowl, add fresh or defrosted chopped fruit, and top with your favourite greek or regular yogurt! 

Mmmm so crunchy & satisfying!
**As always!
Let me know how it turns out for you, feel free to post your questions, comments, and stories below :)

Wednesday, December 17

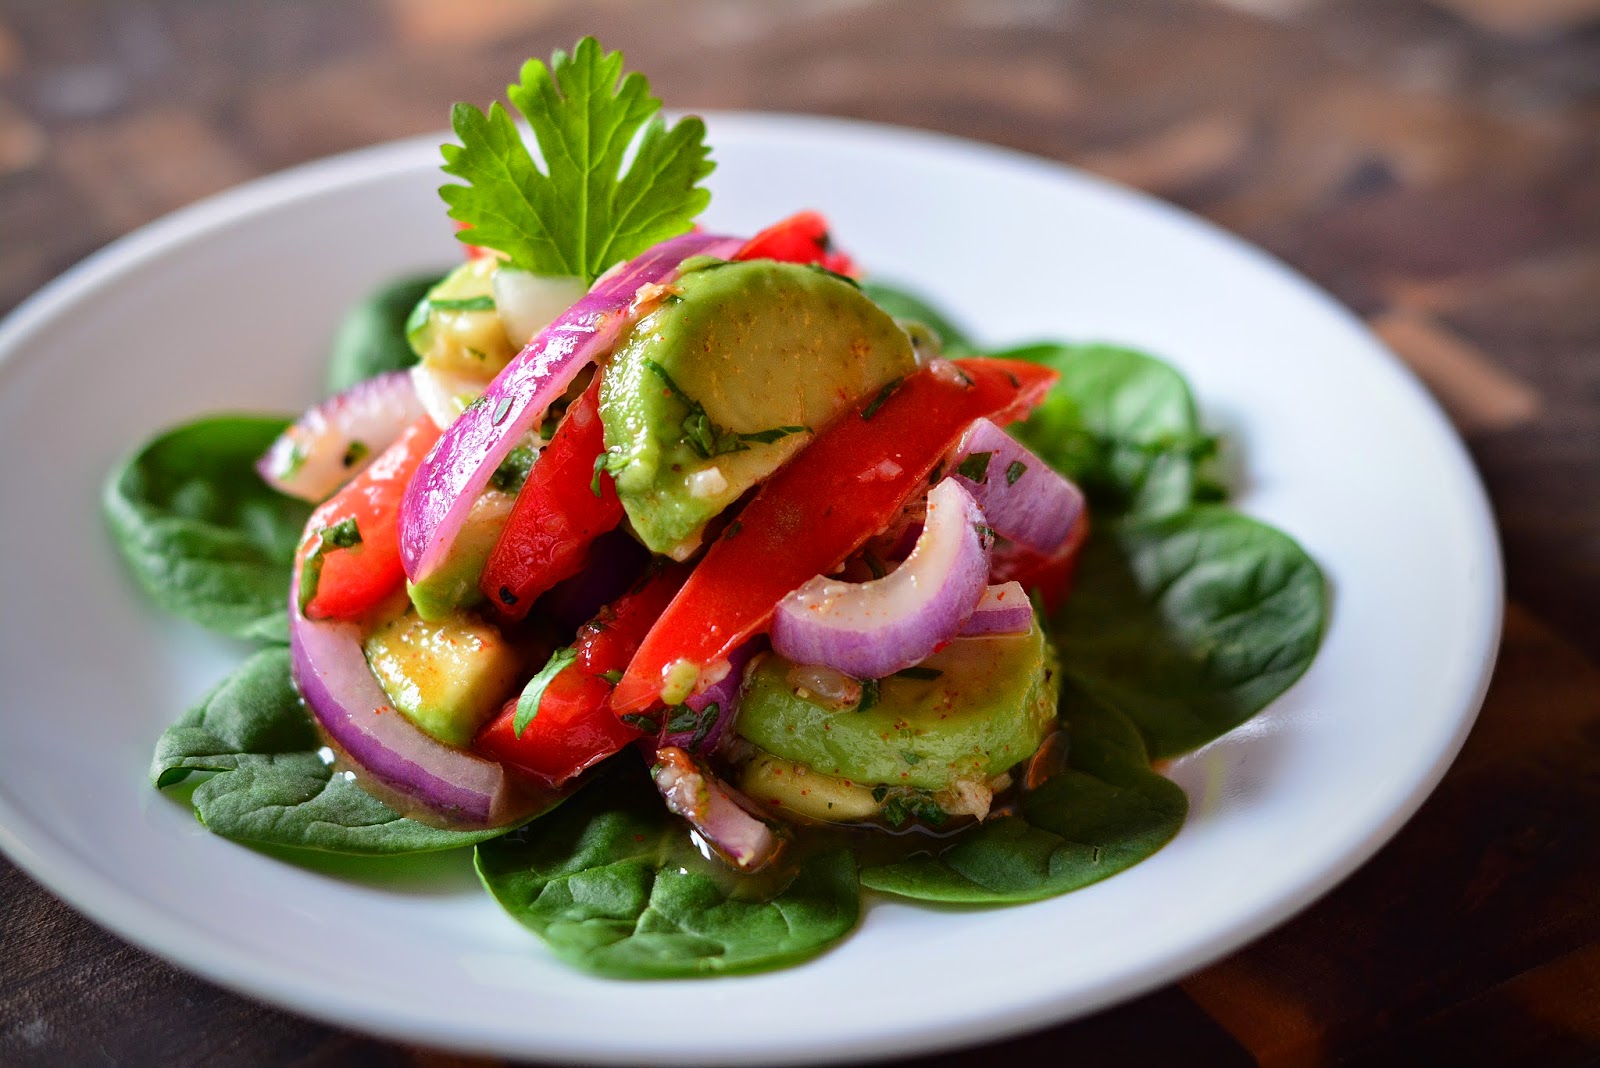
Guacamole Salad - Awaken Your Palate

Simple ingredients can yield an exquisite dish

Every time I pick up a new bag of avocados, I can't help but reminisce on my love for a smooth and savoury guacamole. Comfort food at it's best. When challenged with creating a salad for the lunch menu at Household China and Gifts this past Sunday, I was able to translate this love into one of my most favourite dishes yet. The result? A light, super fresh salad with bright and savoury flavours, perfect for an easy snack or to zest up a holiday family meal.

Pre-Method
Some general tips here,
- Always buy avocados before they are fully ripe and let them ripen in a paper bag. If you buy them when they look ready to use they are often overripe and you will have wasted your money. Unless you find cheap ripe ones at a local market.. they make great guacamole :)
- I like the contrast and sharpness red onion gives this dish, however white onions will also work.
- Ensure ingredients are chilled first if serving soon after making.
- Make ahead and let marinade in the fridge an hour before serving to let flavours develop. 
- If you are sensitive to garlic or onions, simply switch garlic for ginger and onion for shallots.

A Guideline,
You'll need:
- Avocado
- Tomato
- Red Onion

Dressing:
- Fresh Lime Juice
- EVO oil
- Garlic
- Cilantro
- Salt & Pepper
- Cayenne
- Honey

Method
1. For the dressing add fresh lime juice to a bowl, about ½ - ¾ of a lime per avocado. Press and roll limes first to make squeezing easier. Then add 1 - 2 tbsp EVO oil.

2. Mince garlic and sprinkle with salt. Using the flat side of your knife grind into a paste and add to dressing bowl. This way the salt helps release the juice and the flavour will distribute better. A mortar and pestle will also work but just save yourself the trouble.

3. Mince cilantro and add. Season to taste with salt and pepper.. and actually taste it! A couple good dashes of cayenne will add a welcome spice to the dressing. At this point the dressing should be sharp and alive, almost even a bit too strong. Adjust as necessary. Keep in mind it will season the mild flavoured salad ingredients. To balance these flavours add a small spoon of honey. Too much will ruin the dressing as sweetness is not a key flavour. Mix dressing well. Refrigerate to let flavours combine.

4. Slice/dice avocado, tomato, and red onion to desired sizes, but pick a size and stick with it, add to a bowl. Ratio is typically equal amounts of each, less onion if you prefer.

5. Add dressing to the salad. Gently mix, ensuring everything is coated well. 

Done! Serve Chilled

*Finishing Bonus Marks
- Line a plate/bowl with iceberg or romaine lettuce, the crisp/crunchier the better. Place Guac Salad over top
- Garnish with cilantro leaves
- Serve with a small lime wedge

**As always!
Let me know how it turns out for you, feel free to post your questions, comments, and stories below :)

Monday, November 10

Asian Style Stirfry - The Turning Point

Simple, Savoury, FAST, & Absolutely Delicious
International flavours have never been faster, easier, & tastier...

So I've had a crazy birthday week which accounts for my lack of posting content, but during the weekend I decide the stirfry I was making was a more than worthy contestant to share with you guys.

I say "The Turning Point" because this recipe not only puts many great techniques into practise, but allows for growth in perspective. Knife skills, fresh ingredients, palate and taste, even presentation, can all be learned from this dish and be applied to every meal you make. I mean, unless you don't want to create a huge improvement in your cooking...

 Before we start I must give credit to Jaime Oliver and the video of his that inspired me. In his "Dream School" series, Jaime switches up the standard curriculum in a way that gets students more involved and excited about learning. In the "Cooking Class", he teaches a variety of techniques (namely knife skills and 'seasoning to taste' in the video I'm referring) and a dish that allows students to apply the techniques.

When I first watched his video showing how to make stirfrys I was blown away by the impact he was able to make, firstly with solid technique, and secondly being applied to possibly the fastest, easiest, tastiest, and most healthy dish ever. I was certainly spurred on to continue refining my knife skills (because we can never stop improving), and also to make some stirfrys :)

Check out the video here, my version of the recipe is essentially the same but with a few twists.
https://www.youtube.com/watch?v=5z_d0soK1cI

This was probably my 11th time making this stirfry in particular, it's really just that good. I'd also like to think that I've pretty much nailed the dish since this one was by far the best one my kitchen has produced. The savoury, spicy & ultimately fresh flavours is really a breath of fresh air after being stuck in a routine of meals with predictable tastes.

An Asian Style Stirfry like this can easily be tailored to any particular diet, the only real difference is if you want to leave out the meat, if you're restricted from garlic, or are a cilantro hater (if so we can't be friends, sorry) ;)

Pre-Method
In the video Jaime uses (from start to finish) cilantro, garlic, ginger, green onion, hot pepper (all to flavour the dish), beef strips, red and yellow pepper, mushrooms, zucchini. Then worcestershire sauce, soy sauce, honey, & fresh lime juice (if it's not fresh it won't work) to create the distinctive sauce. Then noodles, and cilantro to finish. 
Here's what I used:

All the same ingredients with the addition of a carrot, 3 chicken breasts instead of beef strips, and probably 3x the vegetable volume of what Jaime used in his video. After all I was making this for 3 people, and I still ended up with leftovers... never a bad thing :)
Again, this is all about you, your likes and dislikes, and what's in your fridge. Go ahead and use up the broccoli, throw in some spinach at the end, even try baby bok choy or bean sprouts for a more ethnic touch, it's all good!
*I suggest making one or two portions when you first try this, it's easier to get a better result

A Guideline for 2 servings,
You'll need:
- Oil (usually I'd say olive but any high temp. oil will do)
- Your preferred meat (or not), preferably cut to equal sized strips to ensure equal cooking. Again, I used chicken breasts. One breast is sufficient for 1 or 2 servings. Once you've made this a couple times you can experiment with seasoning your meat. This time I used salt, smoked paprika, cumin, and thyme 
- Noodles. I used rice noodles, depending on the style one section will do
- 2-3 garlic cloves, minced
- 1 inch stick of ginger, minced
- 1-2 tbsp cilantro stems, minced
- 3 green onions/scallions, lightly minced
- 2-3 tsp hot pepper, minced. My small red one there was either a cayenne or a hot red finger pepper
- A selection of vegetables. I used: 1 small carrot or half a large one, 1 small zucchini, 1 whole coloured pepper or two halves, 4 mushrooms and 1/2 cup cilantro
- The sauce includes: worcestershire sauce (which I didn't use because it contains anchovies), soy sauce, honey, and fresh lime juice

Method
*You know how this goes, prep your ingredients first! Then you can focus 100% on cooking. 

1. Let's talk Noodle Science first. Here's the best way to prepare them avoid turning them to mush.
Put dry noodles in a large bowl/container, add cold water to cover. This begins to soften the noodles so they will cook very quickly once added to boiling water. They take a minimum of 10 minutes to soften but this can be done hours or a day in advance, just cover the bowl. Also, to make them easier to work with I like to cut them where they bend, this makes it much less hassle to incorporate in the stirfry than a knot of foot long noodles. 
Add water to a pot and set on max heat, add a little salt, cover. Once boiling vigorously, add noodles. Cook about 1 minute then test for doneness. If needed cook 30 seconds more, 2 minutes is likely too long. 
Immediately drain and rinse under cold water, this stops them from overcooking in their own heat. But now your noodles are cold! Warm them back up by rinsing under warm/hot water.
Now you're a pro noodle cook! You'll never mess these up again :)
To make things easier on your first stirfry, cook your noodles first. Again, so you can focus on the other important stuff.

2. Prep meat (or not). Cut into strips, add to bowl, and season if dezired (not necessary). Set aside.

3. Mince garlic, ginger, cilantro stems, green onions, hot pepper. Set aside.

4. Thinly slice vegetables. This is where good knife technique will come in handy and not only speed up the process but give you great control of dezired size of whatever you cut (not fingers right?). Think about what will cook faster vs. slower, what you want to stand out or fade back, etc. This will determine how you cut your veggies. Doing it all on one large cutting board means less plates or bowls, overall much more convenient.

5. This is where things get really interesting. I could just say, "skillet, med-high heat, 3-5 minutes, then add 2-3 tbsp oil", but this conflicts with me morally a little. For best results you should be cooking at med-high heat. However most people use teflon pans. Upon purchase their packages clearly state they should be used on no higher than medium heat. Most times we need higher heat than that so we crank it up. This leads to leeching of teflon chemicals into our food. This issue with pans is a whole other huge can of worms that I definitely will be discussing in my next post and how to avoid it. In the meantime I suggest using whatever you have that will take the heat and is at least somewhat non-stick.
So, skillet, med-high heat, 3-5 minutes, then add 2-3 tbsp oil.

6. Add minced seasonings, then meat strips. Toss and coat the meat with seasonings, spread out strips, and allow browning to begin. Chicken is more forgiving and can handle being cooked/browned a little longer. Beef is not. There is a fine line with beef strips between soft & delicious, and hard & dry. 2 minutes for beef strips absolute max.

7. As soon as any pink or rawness is gone from the meat or it has browned slightly, add all the vegetables except the cilantro leaves. Toss and sauté 2-6 minutes, depending on size and amount. If a touch more oil is needed add some. You're looking for softening of the veggies but still retaining some bite.

8. Add worcestershire sauce, soy sauce, honey, fresh lime, and toss. Use your instincts here. You can always add more. You're looking for a glaze, not a runny sauce. If runny, cook for another minute. If not, add cooked noodles now along with cilantro, but keep a few leaves for garnish. Toss into stiryfry, coat evenly with sauce. Give the noodles a taste. Check for salt (soy sauce, worcestershire sauce), sweet (honey), tang/acid (lime), add any deficient flavours according to your taste. This is the key to a bright, savoury stirfry.

9. Turn off the heat, ensure ingredients are well combined, take off heat source. To finish, add stirfry to middle of plate, garish with cilantro leaves, squeeze in a little more lime.

Done! Serve Hot**
*Bonus Marks
- Bias cut green onion and/or sesame seeds also makes an excellent garnish
- Drizzle sesame seed oil over stirfry just before removing from heat
- Go traditional. Eat using chopsticks.. it's fun if anything :)

**Final Note
At 2:30 in Jaime's video you'll notice he still has some vegetables left on his cutting board. Welcome to balance and ratios. He left these extra veggies out to retain a balance of ingredients. The "right" amount of meat, noodles, and veggies can really be the deciding factor on this and other dishes. A sea of noodles with sparse elements is not very pleasing. Same goes for if every bite you take there's not a strip of meat to be found. I've totally started to mix in my noodles, only to grab a handful and remove them to retain the "right" ratio. 

Feel free to share your stirfry adventures below, Happy Cooking!